
Last updated on April 29th, 2024
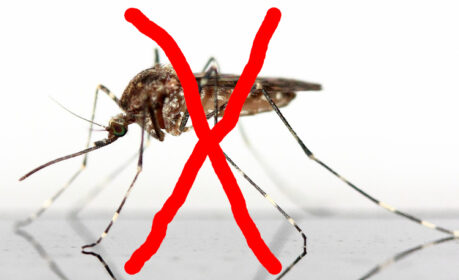
FINALLY, A DIY Mosquito Trap THAT WORKS!
Many of us spend tens or hundreds of dollars each year on sprays, candles, repellents, and gadgets to either kill or ward off mosquitoes, and some, if not most of them, don’t even work. Needless to say, it can be difficult to Prosper when you get a serious disease from a mosquito bite. So, in this Post I will share a simple solution by which you can get rid of those deadly mosquitoes where you live, and where you work, so you can enjoy being outside, and save some money doing it.
One of the top killers in the world is one of the smallest creatures in it. Yes, mosquitoes rank close to number one when it comes to human death.
Two of the many diseases that they can carry are Malaria, and West Nile virus which can cause the brain to swell, and possibly cause death. So, those little nuisances should be eradicated BEFORE they strike. After taking the steps in this Post, you will be better armed to take them out.
Features And Benefits:
Fast acting. Kills the mosquito larvae within 24 hours1
Works 24 hours a day, 7 days a week.
No lights to attract other insects, or bulbs to replace.
No electricity or batteries needed.
No odors. No noise.
No propane or other gases needed.
No foggers or sprays.
No exterminator company treatments or contracts.
Environmentally friendly: All parts of the trap are recyclable, or will break down in the environment, so there is no waste.
Low maintenance, so no daily or weekly attention is needed.
Doesn’t kill beneficial insects.1 Won’t harm pets or wildlife.1
Low cost.
Easy to find materials.
Rain-friendly.
No chemical lures to buy.
No expensive equipment to maintain, or to tempt thieves.
The trap works in spring, summer, and early to mid fall, depending on where you live.
1As per the manufacturer of the MosquitoDunks® and Mosquito Bits®.
These Are The Items You Will Need:
- At least one, small, black (or other dark color), three gallon (or more) bucket2, or other type of container2, preferably with a handle. This is where the mosquito larvae will DIE ! Smaller buckets or containers may be easily blown over by the wind, because they will hold less water. Taller buckets or containers will be heavier to move because of the need for more water (each gallon of water weighs about 8 pounds). The higher water level in a taller bucket won’t allow the needed paint stick to be above the water level in the bucket.
- Water from a spigot, tap water, or rainwater. This is the main lure for the female mosquitoes. Along with the water, the dark color of the bucket, and any heat the bucket will give off from sunshine warming it, they will make the female mosquitoes even more attracted to the trap. Rainwater should not hurt your larvae killing solution, unless the rain in your area is very acidic, which is outside of the scope of this Post.
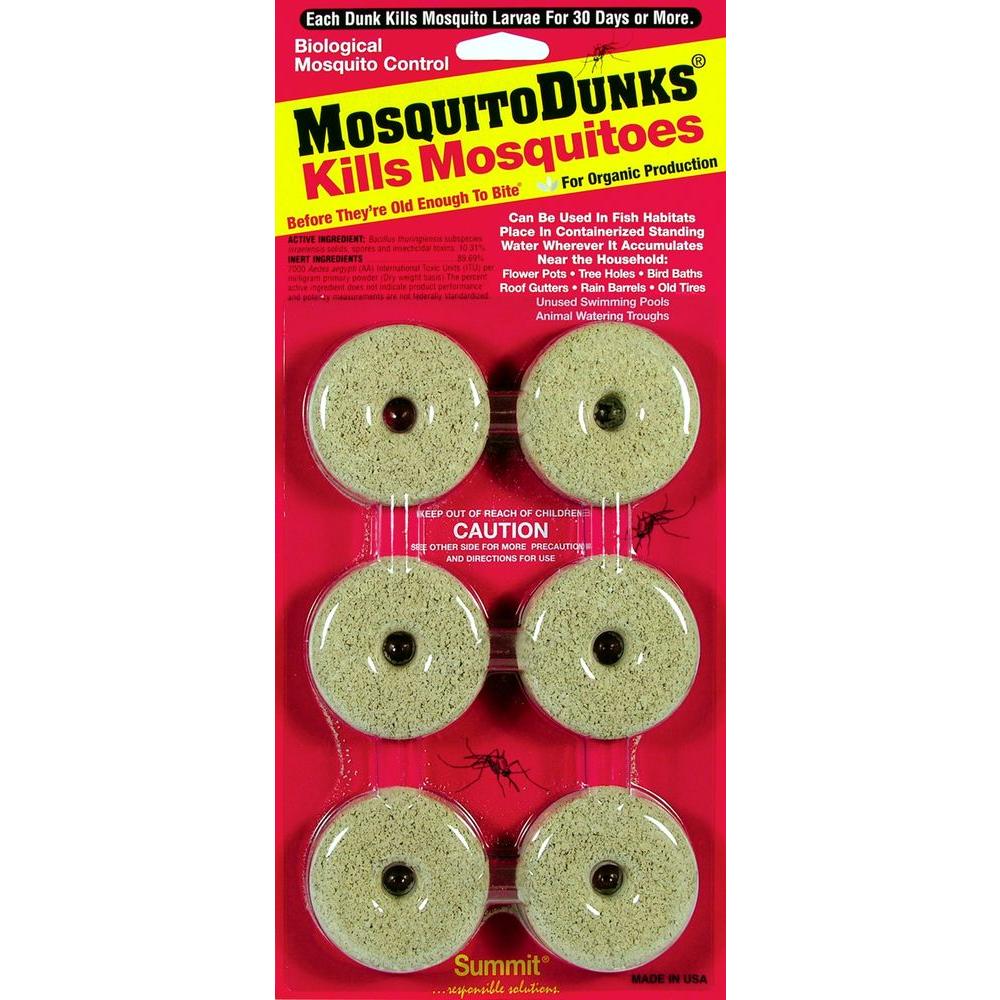
- MosquitoDunks® or Mosquito Bits®. These are what kill the mosquito larvae.

- An electric or battery-powered drill. This is needed to drill the overflow holes in the bucket, in case heavy rainfall causes the bucket to fill up. If a drill is not available to you, use an ice pick or something similar to it, to make starter holes, and then use Phillips screwdrivers of various sizes to make the holes larger.
- A 19/64 inch (7.60 mm) width drill bit. If you only have drill bits of a lot smaller size, and or you won’t be able to make the holes bigger using an ice pick and Phillips screwdrivers, you may need to make more holes in side of the bucket to handle heavy rainfall. Wear eye protection when drilling the holes. Buy a quality drill bit, the cheap ones tend to break, and can be dangerous.
- A wooden paint stick that is long enough to rise above the water level. The stick will be the place for the female mosquitoes to land. Some species of mosquitoes land directly on the water.
- Grass clippings, leaves, and pine straw. These are to entice some species of female mosquitoes to lay their larvae in the water. It will eventually make the water a little murky, which is the type of water some species of females are searching for, to provide a form of temporary food for their larvae after they are laid, assuming they would ever get a chance to mature. There are different types of mosquitoes in the different parts of the world. Some of them prefer plain water, while others prefer stagnant water with organic matter in it, such as the leaves, pine straw, or grass clippings, on which their larvae could feed on.
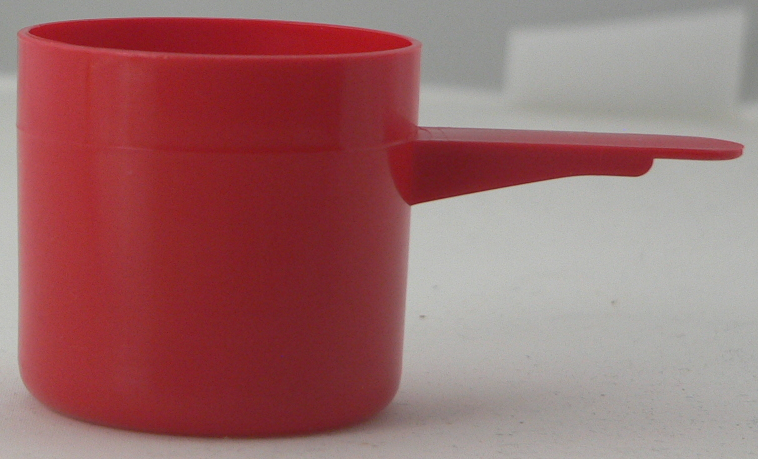
- A small scoop like the ones that come in protein powder containers, in case a scoop does not come with the Mosquito Bits®.
- A shady or partially shady area to put the trap in.
Instructions For The Making The Trap(s):
Using a 3.5 gallon bucket, drill ten holes through the wall of the bucket (or other similar container) about 3.5 inches down from the top edge of the bucket (because 3.5 gallons of water are not needed), all around its perimeter. This will allow excess rainwater to leak out of the bucket without overfilling it.
If you won’t be strong enough to move three gallons of water, place the bucket where you want it to be, then add water to it with a water hose or other methods. Otherwise, start adding water in the bucket until it is just below where you drilled the holes. You can add less water if you like, but the more water that you add, the longer time will you have before it needs more added to it during the spring and summer months. Also there will be more room for the grass clippings, leaves, and pine straw. Place the bucket where you want it to be.
Add3 one of the MosquitoDunks®, or one scoop of Mosquito Bits® to the bucket. The mosquito dunk may float on the surface of the water for a while, and that is alright because it will eventually sink into the water as it dissolves.
Put a handful of grass (or clippings), or leaves, or pine straw in the bucket. You can also put all three of these into the bucket if they are available to you. The grass and leaves can be fresh and green or dried. These too will eventually sink into the water.
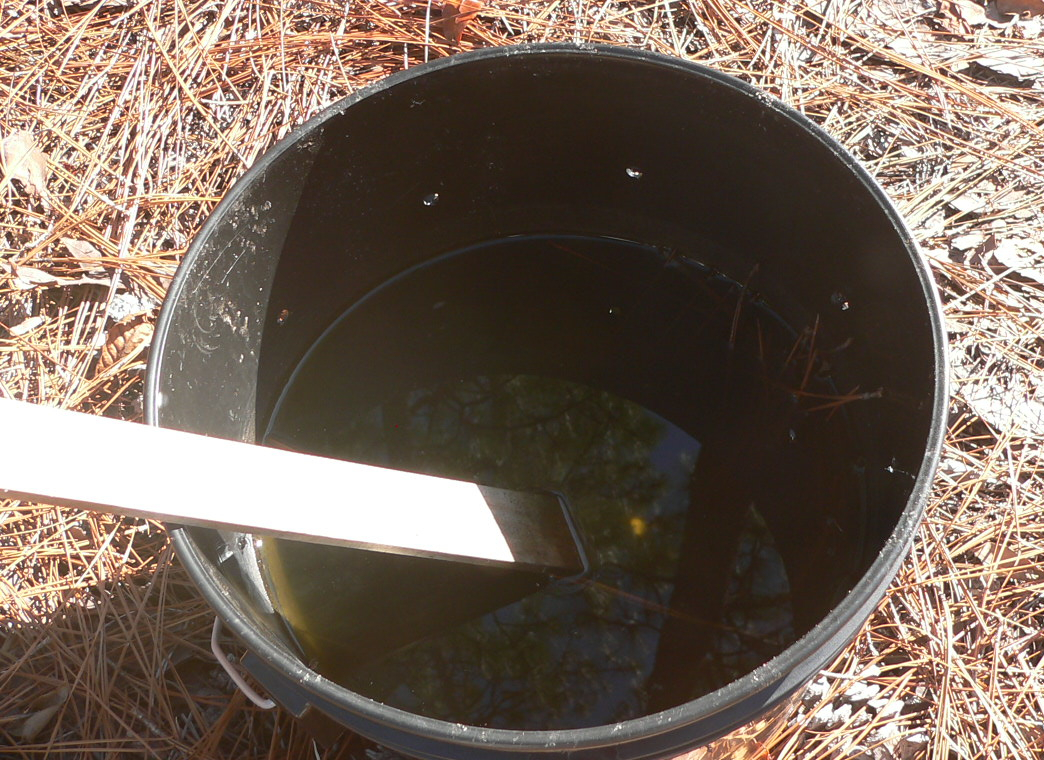
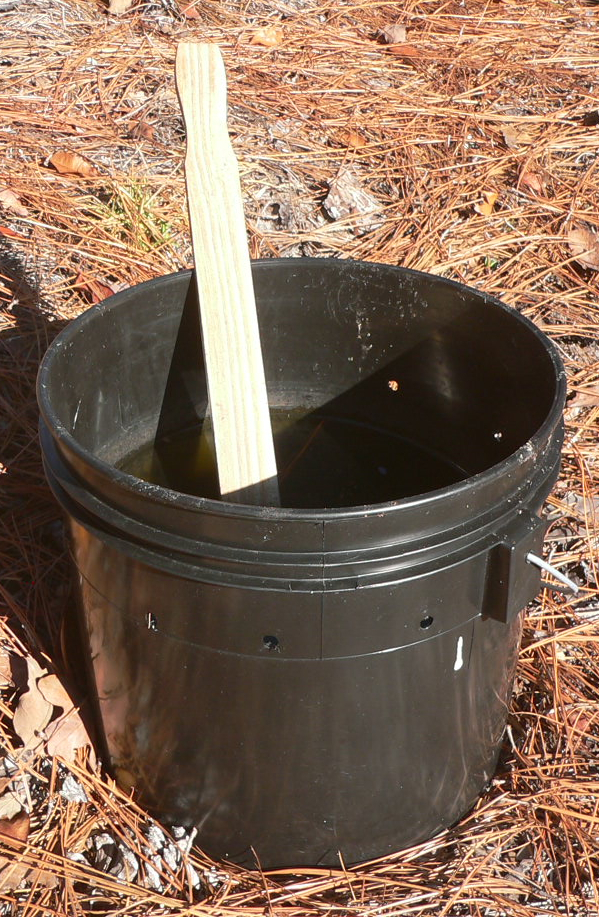
Place the paint stick into the bucket diagonally with one end against the inner bottom wall, and the other end sticking up out of the bucket (see the picture below).
That is all there is to making the DIY Mosquito Trap. You now have a mosquito magnet that can work 24 hours a day.
This is another picture of my 3.5 gallon Mosquito Trap, hard at work killing mosquito larvae:
Trap Placement:
Place the trap(s) at least 25 feet away from your home (if you have that much room) so as not to invite the mosquitoes closer to you or your home.
Place it/them in a shady area away from your home. If a shady area it’s not possible, place them at the corners in your back and front2 yards, or where you like.
Make more than one trap to increase the overall effectiveness of cutting down the mosquito population. A good strategy is to put out four of them, two in the front2 yard, and two in the back, if you have a lot of area to cover. I only have one trap in the back yard at my home because there is only a small area to cover.
There is no need to partially cover the top of the bucket, or to use a cover with a large hole cut/drilled in it. An uncovered top allows the female mosquitoes unobstructed access to get to the paint stick and the water. Any excess water will flow out through the holes that you drilled in the perimeter of the bucket when it rains.
The method works in spring, summer, and early to mid fall, depending on where you live.
Cost For Trap Parts:
Buckets start about $4.00 each.
Paint sticks start around $1.48 each. Some hardware stores will give you one for free.
Mosquito Bits® are about $14.97 per bag.
MosquitoDunks® cost about $10.47 for six dunks in a package.
A 19/64 inch (7.60 mm) width drill bit costs around $7.00.
Estimated totals, as of this writing, without taxes, etc.:
$22.95 for a trap using the MosquitoDunks®, and
$27.45 for a trap using the Mosquito Bits®
Maintenance Required:
Check the trap at least once a week to make sure the water isn’t too low, then fill it up to the height below the holes you drilled, if needed. Also remove any newly fallen leaves that might be floating on the surface of the water solution.
Empty the bucket to change the solution about every 30 days if you have used the MosquitoDunks®, or every 14 days if you have used the Mosquito Bits®. Remember to change the solution after 30 or 14 days respectively, so that your mosquito killing machine does not become a mosquito producing one, because if the dunks’/bits’ pesticide is no longer effective, then the female mosquitoes can use your bucket/container as safe place to lay their larvae.
When it is time for you to empty the trap, simply empty the contents where ants, other insects, or bugs can find the larvae and eat them, or on a nearby roadway.
Eventually, algae will form on the inner surface of the bucket. Use a little bit of bleach with water and a soft bristle brush to remove it, then thoroughly rinse out any remaining bleach.
If some fallen leaves get into the trap, that is alright, but too many leaves can be a problem, because they can float on the top of the water and block the mosquito’s eggs from sinking into the mixture.
After autumn arrives, and or when the outdoor daily high temperature stays below 50 degrees Fahrenheit, you can empty the trap and put it away in storage, because that is the temperature threshold at which mosquitoes become lethargic, and the females won’t be looking for places to lay their larvae, as they prepare to hibernate. Of course, the little vampires will be back in springtime to find their victims. Although some mosquitoes die in cold weather, their eggs that they have lain may not be affected.
Questions:
Does This Trap Kill Adult Female Mosquitoes?:
This trap does NOT kill any adult mosquitoes, unless they drown in it. It only kills the hundreds of larvae that the adult female mosquitoes are laying in it to start the next generation. The adult female will either die from old age (they only live a few days, or weeks), or be eaten by a predator, etc. Either way, the trap helps to reduce the mosquito population in your area, because there will be less adult mosquitoes around to reproduce.
Does This Method Disrupt The Food Chain?:
It shouldn’t, but it is possible to a small extent. Some animals, other insects, and some bugs live off of mosquitoes, but there is going to be water elsewhere in which other female mosquitoes will lay their larvae to become adult mosquitoes that the other animals and insects can feed off of.
Will The Trap Stop Adult Female Mosquitoes From Attacking Me In My Yard?:
Yes, and No. Yes, because it will lower the amount of new mosquitoes in your area that could grow into adult female mosquitoes over time, so there will be fewer and fewer of them to attack you until the current adult ones die off. No, because unfortunately, your neighbors may not have any mosquito killing methods, and or have standing water for the mosquitoes to breed in, so one or a few mosquitoes may occasionally drift into your yard area to bother you, but they too will most likely find your trap, thereby further reducing the neighborhood mosquito population.
After the female mosquito has deposited her eggs into the trap, it will be ready to either rest, eat, die, or find more blood for its next laying. If a female mosquito is “on the hunt” for blood, it won’t pay the trap any mind, so you may be a target until she dies.
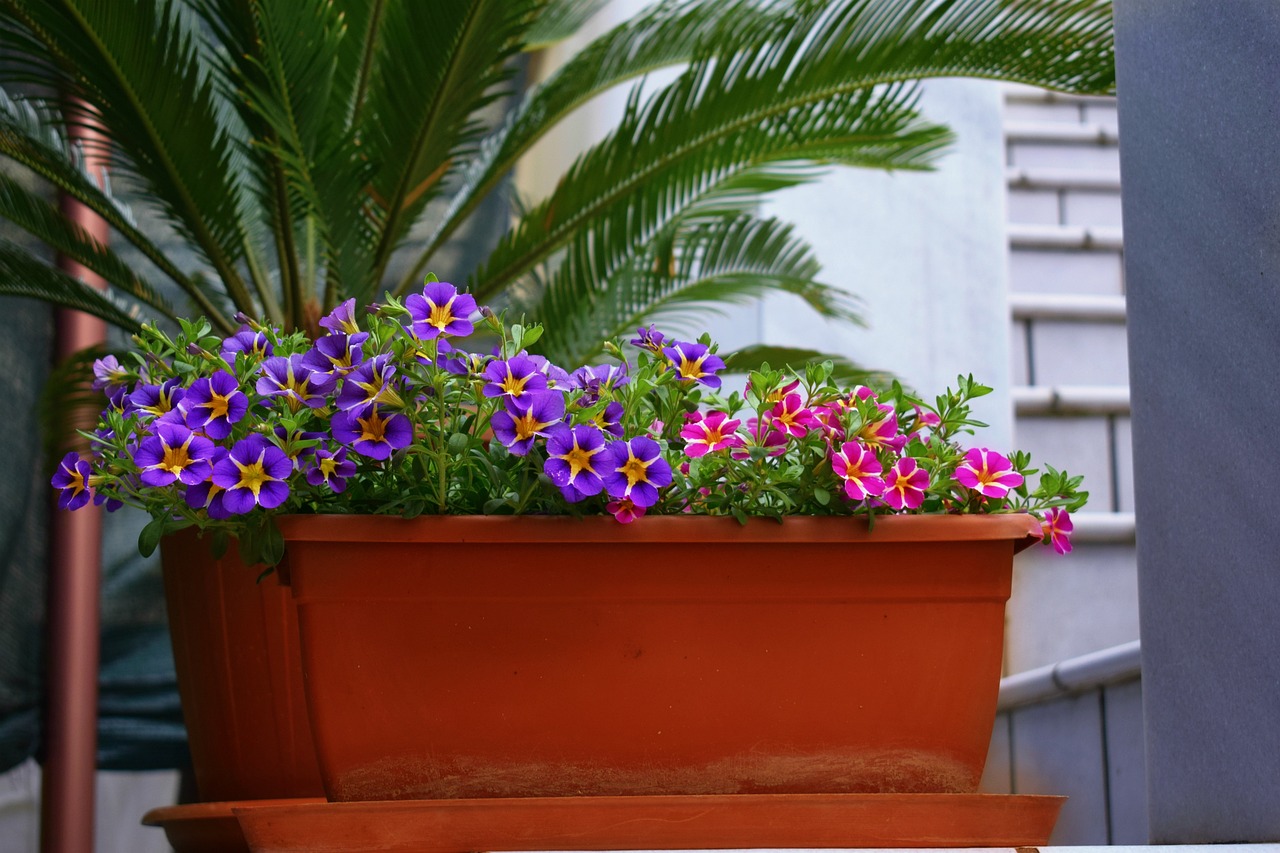
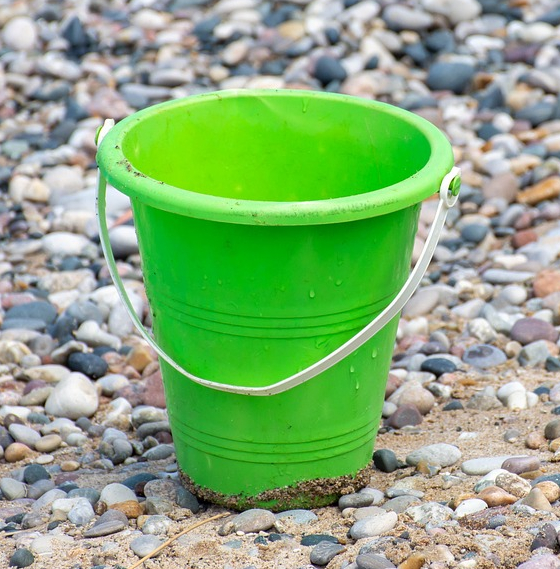
2What Can Be Used Instead Of Buckets?:
Of course, not everybody will want to have buckets in their front yards, because they can be eyesores. So, another option can be to use small planters with flowers (like one of the pictures below). In the planter, make a sunken section in the middle of the soil, or in one side of the soil, to hold a small, two quart or larger plastic pail (like the one pictured below), that can hold the mosquito killing solution beneath the flowers, and break a paint stick or something smaller to a length which would allow it to fit properly in the pail for the mosquitoes to land on. Drill or puncture holes in the pail that will be above the level of the soil, and fill the trap with the same contents that a bucket would hold, but in smaller amounts.
How Long Until The Trap Starts Working?:
According the manufacturer, after the MosquitoDunks® and Mosquito Bits® dissolve into the water, they should start working within 24 hours.
This is my experience after I put my first trap out: I saw evidence of mine working on the second day I placed it in my backyard. I actually saw a mosquito preparing to land in the bucket, and then a smile came to my face. I also noticed a few days later that I could actually walk around my home without being accosted and bombarded by those pests.
Later, I had a similar experience with a trap that I placed at one of my relatives’ home, which was a great relief. Before placing that trap, being anywhere outside at their home was a nightmare, because lots of them would find me in a minute.
Tips:
The female mosquitoes are usually attracted to these things about us, the carbon dioxide we breathe out, the dark color clothing we wear, and our body heat.
If your front or back doors are of dark colors, consider painting them lighter colors that won’t attract female mosquitoes. The problem that I had was when I would come home in the afternoons or early evenings, I would find mosquitoes flying around my front door, which was painted black. After I remembered that they were attracted to darker colors, I painted the door white, and they haven’t been back there since.
Items of dark colors around your front or back doors, like pots and planters, will attract female mosquitoes.
3 ! CAUTIONS ! :
Keep the trap, and the MosquitoDunks® and Mosquito Bits® away from children, and anyone who is mentally impaired. If anyone ingests some of either of these items, seek medical help immediately, and call your local poison control center.
After handling the bits or dunks, or putting your hands into the solution, wash your hands with soap and water.
See the packaging for the MosquitoDunks® and Mosquito Bits® for more precautions and usage directions.
Wear eye protection when making the holes in the buckets and pails.
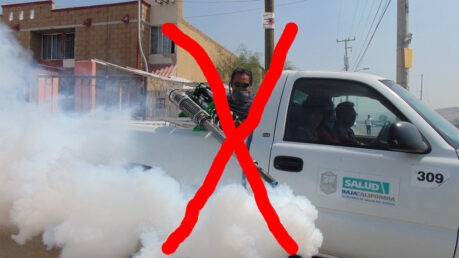
Fumigating entire neighborhoods in blankets of poisonous fog is NOT the answer. Now that there are a safer ways to rid our communities of mosquitoes, if enough people make and use a DIY Mosquito Trap like the one mentioned in this Post, there won’t be a need for the fumigation trucks to come around anymore.
So, if you found the information in this Post helpful, and you know others who would benefit from reading it, share this Post so that more people may Prosper. Also, leave any comments or questions below.
Fumigation photo credit goes to Ernesto Eslava, via Pixabay.com.
Planter photo credit goes to Antonio Rossi via Pixabay.com.
Pail photo credit goes to Jeff Kingma via Pixabay.com.
Mosquito photo credit goes to Mark Minge via Pixabay.com
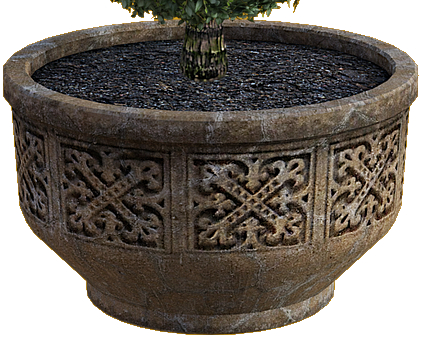
Topiary Round Planter photo credit goes to Vicki Hamilton via Pixabay.com